How to create a L2 tunnel on Ubuntu

Let’s assu me have a network of 192.168.0.0/24 and we want it to span to another location separated by public internet.
The scheme would look like this:

192.168.0.0/24 - <eth1 ubuntu1 eth0> -public internet- <eth0 ubuntu1 eth1> - 192.168.0.0/24

and we want hosts in left part of this disconiguous network are able to communicate with hosts in right part.

1) Fot it to work we need both eth0 interface on ubuntu1 and ubuntu2 to have routable IP addresses. Let’s assume eth0 on ubuntu1 has 1.1.1.1 and eth0 on ubuntu2 has 2.2.2.2.

2) Load l2tp_eth module

modprobe l2tp_eth

For this module to be loaded at start, edit /etc/modules and add  l2tp_eth at the end of the file.

3) Set up a l2tp tunnel and session on both machines:

root@ubuntu1:~# ip l2tp add tunnel tunnel_id 1000 peer_tunnel_id 2000 encap udp local 1.1.1.1 remote 2.2.2.2 udp_sport 6000 udp_dport 5000
root@ubuntu1:~# ip l2tp add session tunnel_id 1000 session_id 3000 peer_session_id 4000

root@ubuntu2:~# ip l2tp add tunnel tunnel_id 2000 peer_tunnel_id 1000 encap udp local 2.2.2.2 remote 1.1.1.1 udp_sport 5000 udp_dport 6000
root@ubuntu2:~# ip l2tp add session tunnel_id 2000 session_id 4000 peer_session_id 3000

To make this setting persistent create a script named l2tp_eth.sh for example, that would contain the configuration above (specific to each host)
and in /etc/network/interface  create a post-up job for eth0

auto eth0
iface eth0 inet static
        address 1.1.1.1
        netmask 255.255.255.0
        network 1.1.1.0
        broadcast 1.1.1.255
        gateway 1.1.1.2
        dns-nameservers 1.1.1.2 8.8.8.8
        post-up /path/to/scipt/l2tp_eth.sh

Don’t forget to make the script executable with

chmod +x /path/to/scipt/l2tp_eth.sh

4) Now you have a l2tpeth0 interface (type ip address show to be sure). It’s time to set up a bridge between internal eth1 and l2tpeth0.
This is how it should look like in /etc/network/interface

auto l2tp_br
iface l2tp_br inet static
        address 192.168.0.11
        netmask 255.255.255.0
        network 192.168.0.0
        broadcast192.168.0.255
        bridge_ports l2tpeth0 eth1
        bridge_stp off
        bridge_fd 0
        bridge_maxwait 0

I picked 192.168.0.11 as this bridge interface for ubuntu1 and 192.168.0.22 for ubuntu2. If this addess doesn’t shows up after reboot, probably you are missing bridge-utils, that can be installed with apt-getinstall bridge-utilsThese addresses can be used as a GWs for some servers in networks left part to access internet hosts provided NAT is set up with

iptables -t nat -A POSTROUTING -o eth0 -s 192.168.0.0/24 -j MASQUERADE

If you are using virtualized servers with VMware vsphere is’t necessary to allow Promiscuous Mode on vswitch or port group so that eth1 would accept frames destined to other hosts.

5) As L2TP is encapsulated into IP and it itself encapsulates ethernet frames we should tune MTU for packets inside the network.

root@ubuntu1:~# ip link set eth1 mtu 1446
root@ubuntu2:~# ip link set eth1 mtu 1446

That’s it. You can place a server in either part of 192.168.0.0/24 network and they will be able to communicate with each other. I suppose these scheme can be used to turn CWMS HA installation into MDC without buying a license.

Recording storage server for CWMS

WebEx Meeting Server allows you to save recordings of your meeting. For it to work there should be NFS share available. I’m using openfiler for that.

1) Get openfiler ISO from https://www.openfiler.com/community/download

2) Create a VM (Other Linux 64-bit) on ESXi host with 2 hard disks: one for the system itself (10GB will be enough), second for storage (I start with 500GB).

3) Boot your VM from ISO and choose graphical installation

4) When it comes to selecting drives, deselect sdb – we will create partitions on it later
500-1

5) When installation is over goto https://<openfiler_IP&gt;:446 and login with openfiler/password credentials

6) Go to Accounts -> Admin password and change to something more secure

7) Start NFS (Services tab)
500-2

8) Set up network access (System tab). I added all network with CWMS servers.
500-3
9) Create volumes. Navigate to Volumes tab and hit “create new physical volumes”, then select /dev/sdb disk
500-4

10) Create a “Physical volume” partition
500-5

11) Click Add volumes (right menu) and create volume group
500-6
12)  Click Add volumes (right menu) again and create volume. Choose XFS Filesystem / Volume type:
500-7
13) Volume is not a share. Go to Shares tab, click on a volume (nfs_for_webex) and add a folder. Then click on e newly added folder and hit “Make share”.
500-8

14) Select public access under “Share Access Control Mode”, hit Update and give RW rights to access group (network from step 8) and hit Update there too
500-9

15) Go to CWMS administration interface and put the whole cluster to Maintenance mode. Then navigate to System -> Servers -> Add storage server and enter <openfiler_IP>:/mnt/vg_nfs/vol_nfs/wx_data/ under NFS mount point field. After a minute or so you’ll see a green sign (Status: Server UP) indicating that storage was added.

16) Go to settings -> Meetings and check Record checkbox. Not attendies can record their meetings (not only audio and video, but also presentaions and screen captures). You’ll also would need special player for these recording. The player installation is available from CWMS user interface.

Free tools for VMware ESXi

There are a couple of tools I use with my test ESXi hosts, which are running with free licence and are not managed by vCenter.

    1.WebUI

This nice package comes from VMware labs and allows you to acces some features of the host from web interface, which is great as there is no desktop vsphere client for Linux.

The package can be downloaded from here. The installation is pretty straightforward. After the installation you can access this UI from https://<esxhost>/ui/. Nice thing – it’s a little big faster the vsphere Web client and doesn’t use plugins.

    2.ghettoVCB

I use this tool(github) to create occasional backups and move VMs from one host to another, which is much faster than using secure copy as it uses vStorage API (VCB). All you need is to:

  • put it on your ESXi host with scp
  • unzip it (unzip tool is preinstalled on the host) to a datastore (if you unzip it to / it will be erased after reboot).
unzip ghettoVCB-master.zip -d /vmfs/volumes/datastore1
  • edit/vmfs/volumes/datastore1/ghettoVCB-master/ghettoVCB.conf

VM_BACKUP_VOLUME- the place the to put backups, usually it’s a folder on a remote datastore, mounted to the host
DISK_BACKUP_FORMAT – disk format, during the backup disk format can be changed from thin to thick and from eager zeroed to lazy zeroed.
VM_BACKUP_ROTATION_COUNT – number of backups
POWER_VM_DOWN_BEFORE_BACKUP- combined with vmware tools on a guest systems this option allows graceful shutdowm of a VM.
ENABLE_HARD_POWER_OFF – forces shutdown.

  • create vms_to_backup file and list names of necessary VMs, each on a separate line
  • run backup with
# ./ghettoVCB.sh -f ./vms_to_backup  -g ./ghettoVCB.conf

Restoration is also very simple

  • create a file vms_to_restore like this:
"/vmfs/volumes/remote_datastore/backups/folder_with_VM1/;/vmfs/volumes/datastore1;4;VM1-test"
"/vmfs/volumes/remote_datastore/backups/folder_with_VM2/;/vmfs/volumes/datastore1;4;VM2-test"

where each line specifies path to backup (the folder with vmdk file), destination on a host where the machine would run, disk format type (4 for eagerzeroedthick) and a new name.

  • run restore scipt
# ./ghettoVCB-restore.sh -c vms_to_restore

The script will clone and register the VM on the destination host. You can power it up from the client later, and client will ask you whether you moved it (uuid and MAC will stay the same) or copied (uuids and MAC would be regenerated and ruin MAC-bonded licences on your VM).

Full documentation on ghettoVCB can be found here(backup) and here(restore).


Collecting alarms from CUCM

In RTMT there is a separate menu named “Alert Central”, where all active and history alarms of CUCM and IM&P nodes are listed. RTMT communicates with Cisco AMC service to get this info anomg other real-time data.

Service parameters for Cisco AMC looks like that:

333

Primary collector is a node (CUCM or IM&P) which would collect logs from other nodes. Cisco suggest to choose least busy node for it. After changing Primary collector AMC service should be restarted on every node.

Logger enabled switch allows AMC logs to be saved as csv files that can be queried later.

Alert files can be found on Primary collector by issuing CLI command

file list activelog cm/log/amc/AlertLog

Files in this directory are generated at midnight every day or when AMC is restarted and file format is AlertLog_MM_DD_YYYY_HH_MM.csv (last part of HH_MM is usually 00_00 or 00_01).

In order to obtain these files programatically there is a special API for that. Here is a simple python script to get the file with alarms:


import requests
def getOneFile(node,user,passw,filename):
    header={'SOAPAction':'http://schemas.cisco.com/ast/soap/action/#LogCollectionPort#GetOneFile'}
    raw_xml = """<soapenv:Envelope xmlns:xsi="http://www.w3.org/2001/XMLSchema-instance" xmlns:xsd="http://www.w3.org/2001/XMLSchema" xmlns:soapenv="http://schemas.xmlsoap.org/soap/envelope/" xmlns:soap="http://schemas.cisco.com/ast/soap/">
   <soapenv:Header/>
   <soapenv:Body>
      <soap:GetOneFile soapenv:encodingStyle="http://schemas.xmlsoap.org/soap/encoding/">
         <FileName xsi:type="get:FileName" xmlns:get="http://cisco.com/ccm/serviceability/soap/LogCollection/GetFile/">/var/log/active/tomcat/logs/manager.2016-02-11.log</FileName>
      </soap:GetOneFile>
   </soapenv:Body>
</soapenv:Envelope>""".format(filename)
    try:
        response=requests.post('https://'+node+':8443/logcollectionservice/services/DimeGetFileService',data=raw_xml,auth=requests.auth.HTTPBasicAuth(user,passw),verify=False,headers = header)
        return response.text
    except:
        return -1
if __name__ == '__main__':
    print getOneFile('192.168.0.1','admin','admin','/var/log/active/cm/log/amc/AlertLog/AlertLog_02_08_2016_00_00.csv')


The user, which queries the file might be your administrator Application user with access to AXL applications.

The output should look like this:

Content-Type: text/xml; charset=UTF-8
Content-Transfer-Encoding: binary
Content-Id: <80DB2208357F8BD76EE58C1967C79E0D>

<soapenv:Envelope xmlns:soapenv="http://schemas.xmlsoap.org/soap/envelope/" xmlns:xsd="http://www.w3.org/2001/XMLSchema" xmlns:xsi="http://www.w3.org/2001/XMLSchema-instance">
    <soapenv:Body>
        <ns1:GetOneFileResponse soapenv:encodingStyle="http://schemas.xmlsoap.org/soap/encoding/" xmlns:ns1="http://schemas.cisco.com/ast/soap/">
            <DataHandler href="cid:BC0EDD33C6D0C7A1F6286E3691F95332" xsi:type="ns2:DataHandler" xmlns:ns2="DimeGetFileService"/>
        </ns1:GetOneFileResponse>
    </soapenv:Body>
</soapenv:Envelope>

Content-Type: application/octet-stream
Content-Transfer-Encoding: binary
Content-Id: <BC0EDD33C6D0C7A1F6286E3691F95332>

Time Stamp,Alert Type,Alert Name,Alert Message,Monitored Object Name,Severity,PollValue,Action,Node ID,Group ID
1454882401636,0,CriticalServiceDown, Service operational status is DOWN. Cisco Presence Engine. The alert is generated on Mon Feb 08 00:00:01 EET 2016 on node 192.168.0.34., ,2,0,admin@exmaple.com;,192.168.0.34,System
1454882431615,0,CriticalServiceDown, Service operational status is DOWN. Cisco Presence Engine. The alert is generated on Mon Feb 08 00:00:31 EET 2016 on node 192.168.0.34., ,2,0,admin@exmaple.com;,192.168.0.34,System


As you can see the last part of the output is the content of the file with alarms thrown by CUCM and IM&P, where every line start with a timestamp (with milliseconds). So parsing this output is rather simple.

With this in mind you can create a zabbix server check and monitor UC alarm with common software and stop relying to emails and RTMT.

Telepresence SW CE8

Cisco released new software for SX series Telepresence endpoints a couple of month ago. That SW introduced wireless desktop sharing from PC and MAC.
Here are some features of this innovation
1) To enable BYOD (that is Proximity) there is no need to login to endpoint’s web interface and search for hidden BYOD configuration parameter. There is separate menu”Proximity” for it. Moreover, it’s provisioning now is available from CUCM’s device page:

222
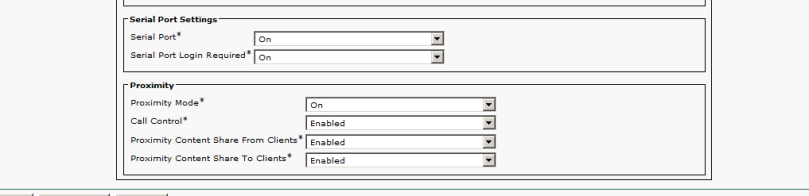
So now we can use BAT to enable Proximity on all devices.

2) The Proximity software for desktop can be downloaded from  https://proximity.cisco.com/. But unlike the Proximity for Android or IOS desktop version allows you to share content only.
3) My DELL laptop refused to connect to my SX10 until I switched off Wave MaxxVoice which tampered with built-in mic. So in order to use you have to train your staff to turn off every mic enhancement on their laptops.
4) As with Proximity for mobile desktop version listens to ultrasound and extracts codec’s URL from it. Then it connects to is via HTTPS. The desktop capture also uses TCP 443 for transferring images.
5) Current version doesn’t show mouse cursor while sharing desktop. According to Cisco community they are going to fix it in next releases.

6) The image of CE software is pretty big and uploading and extracting cop.sgn file caused my CUCM server CPU utilization to reach almost 100%, so it’s better to do it during off-hours.

Jabber bot for Cisco IM&Presence

Creating a bot for Cisco Jabber isn’t very difficult: you’d need a python3 interpreter (ships with all latests Ubuntu installations) and a slixmpp library. I’m using pip to install slixmpp like that:

apt-get install python-pip3
pip3 install slixmpp

The example from slixmpp github repo (under “The Slixmpp Boilerplate” subtitle) is working right from the box: just specify bot’s username and password and IM&P server name or IP. If you need your bot to read or calculate some data and send it to you on a regular basis here is a modified example:

import logging
import asyncio
import datetime
import time
from slixmpp import ClientXMPP
from slixmpp.exceptions import IqError, IqTimeout

@asyncio.coroutine
def asleep(t):
    yield from asyncio.sleep(t)

def calc_smth():
    return time.mktime(datetime.datetime.now().timetuple())

class EchoBot(ClientXMPP):

    def __init__(self, jid, password):
        ClientXMPP.__init__(self, jid, password)
        self.add_event_handler("session_start", self.session_start)
        self.register_plugin('xep_0199')
    def session_start(self, event):
        try:
            self.send_presence()
        except IqError as err:
            self.disconnect()
        except IqTimeout:
            self.disconnect()


    def disconnected(self, event):
        print("%s disconnect" % self.jid)

if __name__ == '__main__':
    logging.basicConfig(level=logging.ERROR,format='%(levelname)-8s %(message)s')
    try:
        xmpp =  EchoBot('bot@example.com', 'password')
        xmpp.connect(address=("IM&P IP", 5222))
        xmpp.process(timeout=0.1)
        while True:
            asyncio.get_event_loop().run_until_complete(asleep(5))
            xmpp.send_message(mto='johndoe@example.com', mbody="Timestamp={}".format(calc_smth()), mtype='chat')
    except (KeyboardInterrupt, SystemExit):
        xmpp.disconnect()
        print("Done")

Just change bot’s JID  and password (bot@example.com and ‘password’ in this example), destination JID (johndoe@example.com), modify calc_smth function for it to do something usefull instead of calculation current timestamp and launch it with

python3 bot.py

Cisco TMS, TMSPE and CMR

Collaboration Meeting Rooms by Cisco is a wonderful collaboration tool I first heard of during the latest Cisco Connect in Moscow.
I think of it as an e-mail, but for video or audio conferencing: everyone have their own URI (e.g. a person with email address of johndoe@example.com might have a CMR johndoe@cmr.example.com) that can be accessed from a number of devices like browser via Jabber Guest,desktop and mobile clients like Cisco Jabber 4 Win/Mac/Android/IOS, video codec or desktop phone.

For this to work you should have CUCM, IM&P, Telepresence Conductor and Server, TMS and TMSPE. Also Cisco suggests to adopt Personal Multiparty licensing but you can stay with Screen licensing as well.  Documentation about installation of Telepresence Conductor and Server and integrating them with CUCM is rather thorough. But I personally can’t say the same about TMS/TMSPE/CMR deployment guide. So I’d like to cover some things I encountered during implementing CMR 5 in TMS with Conductor, CUCM and Server already installed for AdHoc and Rendezvous conferencing.

1. TMS installs on a Windows Server  2012 (CUCM once was a Windows appliance as well), so it’s a good idea to have this server to be a part of the domain, as IIS which serves a GUI for configuring CMR uses windows authentication.
2. If you are planning to install 2 TMS for redundancy you should use separate MSSQL server for tmsng (and others like tmspe,tms_userportal, tmspe_vmr) databases. Cisco also specify MSSQL versions you should use: Microsoft SQL Server 2012
All versions, 64 bit only or Microsoft SQL Server 2008 R2 All versions, 64 bit only
3. If had you configured TMS already, but found that you had accidentally connected to the wrong MSSQL server there is an application named TMS tools installed along with TMS that can change db connection details.
4. When installing TMSPE you might get a Java error – it happened to me when I had JREv8 installed. After downgrade to jre-7u80-windows-x64 the problem gone
5. When TMSPE is installed you may ‘connect’ it to TMS with Administrative Tools -> Configuration -> General Settings ->  Provisioning Mode: -> Provisioning Extension
6. All your users by default would be able to access Smart Scheduler, which is great but it has so many limitations, like you cannot add non-Cisco-codec destinations (this codecs should be present in TMS) to scheduled conference. So if you don’t want to confuse them it’s better disable Smart Scheduler until it becomes more feature-rich: Administrative Tools -> User administration -> Default System Permissions -> uncheck ‘Book’ check-box against Group Name ‘Users’
7. If you want users to access CMR configuration you should import users to TMSPE. I use LDAP for that. LDAP or AD import mappings to TMSPE can be configured here: Administrative Tools -> Configuration -> Provisioning Extension Settings
The import itself is configured under Systems -> Provisioning -> Users -> User import. Also it’s nice to have Video Address Pattern and Device Address Pattern configured under User setting in a form of {username}@cmr.example.com
8. Next step should be adding of Telepresence Conductor under Collaboration Meeting Room Templates (click TelePresence Conductor Settings and specify it’s address and admin credentials). TMSPE support only one Conductor, but it’s okay
as TMSPE only pushes CMR configs and doesn’t process calls so it doesn’t need as much redundancy as Conductor.
9. To configure a template click to New Template, choose a TelePresence Conductor configured earlier, SIP alias pattern in a form of {username}@cmr.example.com, Numeric alias pattern if you want CMRs to be accessed from phones with dialpad only (I used a prefix like *1* to distinguish CMR numbers from internal DNs).
Other interesting parameters are Allow Guest Role and Guest Lobby: it allows users to share their CMR numbers and aliases with others and invite them to their CMRs, so when a guest joins your CMR it just dials # and waits for a host to connects while looking at a lobby screen.
10. If you want users to connect to their CMRs add a SIP route pattern of cmr.example.com and *1* Route pattern pointing to SIP Trunk to Conductor used to start Rendezvous conferences in CUCM.
11. CMR are populated to Conductor by TMSPE only when a users access CMR configuration page at http://<tms_fqdn>/tmsagent/tmsportal/#home and finally configures it (assigns a PIN and an optional name). You can check if CMR is there in Conductor goto it’s admins interface Status ->  Collaboration meeting rooms and search for a CMR in a form of johndoe@cmr.example.com.

In essence, there are so many nuances when deploying CMRs and I think that Cisco should include the overall description of this technology into top-level design documents like Collaboration SRND.

Cisco Jabber update 11.5

There is a known vulnerability in Cisco Jabber versions lower than 11.5 http://tools.cisco.com/security/center/content/CiscoSecurityAdvisory/cisco-sa-20151224-jab. So I decided to perform a cetralized update on my user’s PCs and MACs.
First thing to to is to implement automatic upgrades
1) Go to Cisco Unified Operating System Administration -> Software upgrades -> TFTP File Management and look for jabber-config.xml. It can be also accessed from http://<cucm IP>:6970/jabber-config.xml.
2) Download it to your PC and edit it to add Client section like this

<config version="1.0">
<Client>
<UpdateURL>http://<your 3rd party web server>/jabber-update.xml</UpdateURL>
</Client>

3) Upload it to CUCM TFTP: Cisco Unified Operating System Administration -> Software upgrades -> TFTP File Management -> Upload file to / directory. Then restart TFTP service on every CUCM node (I’m not completely sure if it’s needed at all as updated file appears even without restart)

4) Now host a file named jabber-update.xml  on a 3rd party web server. It should look like that:

<JabberUpdate>
  <App name="JabberMac">
     <LatestBuildNum>226858</LatestBuildNum>
     <LatestVersion>11.5.0</LatestVersion>
     <Message>This new version of Cisco Jabber</Message>
     <DownloadURL>http://<your 3rd party web server>/Cisco-Jabber-Mac-11.5.0.226858-<long string with random characters - see below for info>.zip</DownloadURL>
  </App>
  <App name="JabberWin">
     <LatestBuildNum>26858</LatestBuildNum>
     <LatestVersion>11.5.0</LatestVersion>
     <Message>This new version of Cisco Jabber</Message>
     <DownloadURL>http://<your 3rd party web server>/CiscoJabberSetup-11.5.0.26858.msi</DownloadURL>
  </App>
</JabberUpdate>

This long string with random characters in the file for update of MAC version can be found in release notes. But I consulted Cisco TAC because there were no release notes in download portal at Cisco.com when I was there that moment. And of course these zip and msi install files should be also accessible and biuld and version number should be consistent.

5) Now every user who will restart Cisco Jabber would get a message which encourages them to upgrade. But they can skip it unless you specify <Mandatory>true</Mandatory> in jabber-update.xml.
6) In order to check upgrade status I use RTMT. Go to Voice/Video -> Device -> Device Search -> Phone. Choose Any status, Any protocol, Any model, and Device name like CSF* and it will show a table with all CSF devices and their active load
7) If you want to export it you should use CLI:
– login to CLI with platform admin
– issue show risdb query phones file alldevices to create file alldevices.txt inside  platform/cli/ folder which lists all devices and their active loads.
– issue file get activelog platform/cli/alldevices.txt to upload it to SFTP server. CLI would ask a couple of questions about IP of SFTP, username/password, direcotry and correctness of server fingerprint. I’m using freeFTPd (http://www.freesshd.com/?ctt=download) as SFTP which very easy to install.
– repeat it for every CUCM node (every one with CallManager service running) as show risdb query phones will list devices registered only for the node it’s run on.

Now you have a file with list of every device in CUCM. I use Excel to sort it and extract only CFS devices. In most cases you can find user login right after CFS in device name so it should be easy to spot lazy users.
This approach has some restrictions as it will list only Cisco Jabber users that are using phone services and leave those who use only IM. Moreover RTMT and show risdb will list devices with statuses of Registered/Unregistered and not the ones with None status which
indocates that these users launched their Cisco Jabber quite some time ago.

Cisco Jabber (CAXL) powered web chat

Cisco IM&Presence server provides the ability to connect to it via BOSH interface. In order to turn this feature on navigate to Cisco Unified IM and Presence Serviceability -> Tools -> Control Center – Feature Services -> choose a node -> Cisco XCP Web Connection Manager and check if it’s started and activated.

Next, check what security setting are applied to it: Cisco Unified CM IM and Presence Administration -> System -> Security -> Settings. If Enable Web Client to IM/P Service Secure Mode is checked you’ll use https to reach BOSH interface, http otherwise.

Now let’s check if BOSH interface is up: navigate to https://cup_server_name:7335/httpbinding (use http if you are not using secure connection). You browser should show something like this:

123123

This URL can be overriden by modifying Cisco Unified CM IM and Presence Administration -> System -> Service Parameters -> choose a node -> Cisco XCP Web Connection Manager -> HTTP Binding Paths Handled – Path field.

I know only 2 clients that support BOSH connections: Pidgin and CAXL, which is a Cisco javascript library. The description of the latter can be found here and library docs here.

I decided to implement web chat, based on this library. The source can be found here. You’ll need Python2 with Flask and  requests modules for it to work.

After launching the app you’ll se a login screen:

login123123123

  • username: full username with domain part, e.g. user@example.com
  • password: end user password
  • IM&P node: FQDN or IP address or IM&P Node with Cisco XCP Web Connection Manager running
  • chat alias: full group chat name in a form like chat_name@chat_alias. Navigate to Cisco Unified CM IM and Presence Administration -> Messagin -> Group Chat Server Aliases  Mapping to check what chat_aliases are available

Once logged in the main window should look like that:

main123123123

The styling is pretty simple and can be modified.


Hunt pilot alerting name

Hunt pilot is a cool CUCM feature  that allows you to spread an incoming call across multiple lines. In version 10 of CUCM Cisco added queueing capabilities introducing tiny call-center.
Hunt pilot setup follows standard CUCM 3-tier configuration scheme: hunt pilot number refers to a hunt list which is a sorted list of line groups. The latter are the groups of DNs.
This allows you to have a DN in multiple line groups. But here is a complication: when someone calls a Hunt pilot the recipient sees a calling number of this someone and not the hunt pilot.
What if it’s a sales manager that is a member of hunt pilots and he have difference greetings for each hunt pilot number?
There is a Advanced clusterwide service parameter for CallManager service, which allows our sales manager to identify a hunt pilot he’s been reached from:

1

In hunt pilot configuration page you can set alerting names:

2

Calling Line ID Presentation and Calling Name Presentation should be set to Allow if you want a called party to see who’s calling (not the hunt pilot alerting name but caller id). Connected Line ID Presentation and Connected Line ID Presentation  should be set to Allow if you want a called party to see resulting DN Caller ID once on call.

The result should look like that for Cisco Jabber notification:

3

and on a phone screen:

4

The default behaviour for this function is enabled for CUCM of version >10. But I’m not sure when this parameter was introduced and I think that this feature would be switched off after upgrade from a version where it was absent.